Tuesday, November 29, 2011

No title

IMG_0514As we were pottering around on the weekend, I thought, I must empty the grey water tank as there was a slight smell when you took the plug out of the sink. Well it turned out to have a bit of mould in it which came out quickly after bleaching. When I put it back in empty, I put maybe a few table spoons of bleach in there. I figured it may stop or slow growth next time.

Unfortunately, they fresh water bottle also had a slimy brown mould in it as well – thank goodness we were not drinking it. Same treatment, bleach fixed it, and ran through maybe 5L of bleached water through the lines, filters and pump to clear out anything in there.

We moved the storage/bed cupboard over 125mm which allowed for the cushion to sit down the back while driving, but also meant there wasn’t such a large gap beside the bed to roll off. Finished off nicely with two cushions which double as pillows.

The main idea with the roof rack, was to allow storage of non-critical, non perishable, bulky goods outside the car, leaving the nice dry secure space inside for clothes, food and valuables.  As life is an eternal compromise, it seemed ever-present in our choice of external storage.
My major concerns in order are:

Weight
Weight is everything. Every single kilogram above the roof changes the handling and off road capability significantly. A good steel box would be cool, but we’d be nearly overweight before putting  anything else on! The other point is we need to be able to assemble and dissemble the roof rack and load/unload it’s contents wharf side. No point putting our backs out before we even start.
Dust/weather resistant
Initially, I thought I had a kickass idea of buying an icebox for the job. It would be light weight, lockable and damn water proof. But that has two inherit downside. If it’s water proof, and holds ice for 8 days, it is also airtight. If it’s airtight and we’re changing altitude continually, it may well fracture from the differences in pressure and or be impossible to open. Pelican cases are designed with this problem in mind and are equipped with pressure equalisation valves… ice boxes are not. An esky is ‘weather proof’ but not airtight… perfect! Also, it should regulate the temperature fairly well as to avoid things melting or degrading in the sun.
Price
It goes without saying that price is a consideration is most purchases. Because it’s insecure, on display and potentially a total loss (as it’s uninsured), I thought it prudent to not tie up much money in this article. To take it one step further… we already owned this and now that we have a fridge, we don’t use it as an icebox. And because we may need one or two more, it means the cost shouldn’t skyrocket.
Security
The only reason I’ve ranked security lowest on the list is because it’s near impossible to do much about. We could have the best lock, best box, secured to the roof rack… and someone could just take the roof rack off, or steal the car. Its one of those things I’m consciously trying to relax about.

So with all that in mind, we ended up with the below: Hacky some might say, but oh well – I think it’s ideal.IMG_0492

They are a little difficult to secure as the side handles are flimsy (not designed for this purpose) but I also wanted to be able to open it without unstrapping it. It does look a little out of place at the moment, but with the Maxtrax, spare tyre and one or two more boxes it will look ok.

IMG_0490

This box currently contains:
Jacking plate, gloves, snatch strap, tree trunk protector, jumper leads, spare air hose, multiple chains and D bolts. Not pictured is a heap of rags and overalls.

On a follow-up to the previous post, the belts were indeed wrong… but not the length, the width. The ones I was delivered were 13mm wide, these ones are 11mm wide. They slid on instantly. Also pictured is the idler pulley adjuster bolt which was mysteriously missing.  The supplier apologised for accidently supplying the wrong one and was going to send new ones or refund me the total amount. It didn’t sit well with me as I had cut one, but he did compromise and allow me to send the unused one back for a refund. Some people may scoff at that, but I’d rather be fair than take advantage of them.

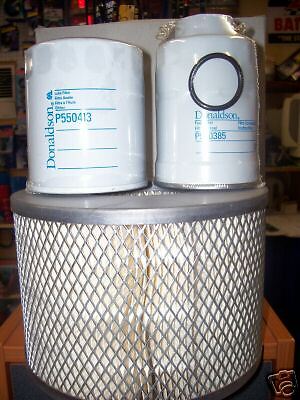
Tonight I ordered a ‘filter kit’ from eBay… containing an oil filter, fuel filter and air filter. ($70 Delivered) I think I’ll change the fuel and oil filters soon, but order some more before our trip. I’m sure we’ll be able to source and oil filter in our travels, but I can’t help but think it’s easier just to carry the two we’ll need. I’m not sure if you can really ‘store and reuse’ an old fuel filter, I’m pretty sure it’s like an oil filter in the sense it’s used once it’s used.

IMG_0479

I’d welcome some ideas on how you can test if a snorkel is sealed. I figured you could remove the air cleaner, block it off somehow and fill the snorkel up with water to see if it leaks? The reason for the question is that the rubbery seal between the body and the snorkel seem to be a bit loose for my liking and would like to just KNOW it’s perfect as if it’s not, it would put a huge dampener on the trip if we needed a new engine. The internet is amazing. A couple of people confirmed my idea, a few others just take the snorkel head off, and cover it with your hand. It’ll either stall, or suck air from somewhere else.

IMG_0516

I’m sure I’ve mentioned before how rubbish the drivers seat is. One of the previous drivers was a large guy and the left hand side support is crushed flat and the right one isn’t much better. I did try repairing it a few months back but it wasn’t much better. I got a rough quote by emailing some pictures for a $350-$660 to repair the seat. So far original seats are fetching $600~ sort of money for a used one. Everyone complains about them, so at this stage I’d prefer to fix this super-doper one.

I made the mistake of having a quick sleep this afternoon – so far I’ve been up for two hours past when I tried to go to sleep around 10:30 tonight. Oh well – I’m still not tired.

Sunday, November 20, 2011

Two wrongs don’t make a right

IMG_0343

Thanks to the magic of ecommerce, I ordered a ‘hose and belt’ kit for our ‘Toyoda’ off eBay.

The morning started well at around 9 o’clock, as I drove to Fyshwick (a local industrial area) as it was bound to be deserted on a Sunday. It’s ideal to work in as there is concrete everywhere, no prying eyes and your not in anyone's way. Ironically i ended up being in the way of two seperate people! In an estate with 20 shops, I was parked right out the front of those exact two. It also proved valuable shelter in the rain today under a shop awning.
I setup shop with tools and parts everywhere. I started by loosening the lock nut on the idler pulley, which is followed by adjusting down the tension on the pulley… but there is no adjustment bolt. It was absent because I suspect someone previous to me snapped it. Thankfully I was acutely aware of this as this type of thing has caught me out before, if you don’t loosen the lock nut, you end up breaking the adjuster bolt. So that belt came off easy.

Next step was to remove the two belts that drive the water pump & fan and alternator. The procedure for replacing fan belts is to loosen the alternator adjustment bolt and push the alternator towards the block which loosens the belts. Only problem was no matter how loose I made the bolts it was mighty stiff to move. I loosened it off about half way and was able to get the belts off… on a roll I thought.
As the coolant was still too hot to do the second half of the operation so I thought I’d put the new belts on. It would have been easier to change the hoses without the belts, but wasn’t as time efficient.

Well… I expected the new belts to be tight, but my oath, they weren't even close. Pulled as tight as I could, they would still only make it about half way round the alternator pulley. I found some more adjustment in the alternator by removing the A/C compressor and pulling the alternator with everything I had towards the motor. I looked like a right monkey sitting on the motor but it was the only way I could get the right angle. Even in this position it still wasn’t enough. I virtually removed the bottom pivot bolt and the adjuster bracket as it was too tight against the alternator… finally managed to get the alternator tight up against the motor. Annoyingly this bracket is held on by the same bolts as the water pump, so as soon as I cracked the bolts it started to leak. ‘dammit’ I thought – that better seal back up when tightened back up.

IMG_0421

In my efforts I thought I would lever the alternator into submission using a screwdriver in one of the vents… turned out it just smashed out. dammit. Doesn’t really effect anything, it just looks dumb (pictured right). So, you would think now that the belts would just fall on… nope.
HOURS went by trying different techniques, different angles, soap, levers. Finally I got ONE on, but it was on the outside of the two… it needed to go on the inside. More hours went past and I just couldn’t get it to go on. On approximately 21 different viewings to confirm that the belts were indeed identical to the ones that came off.
Taking a break from the stupid belts, I changed the hoses. Oh my. Sometimes having the correct tool helps, sometimes some jobs are just downright hard work. In theory, the job of replacing the hoses is perfectly simple. It goes without saying that I didn’t have the correct tool to compress the clamps and fashioned up a technique of ‘winching’ the clamps open using…. yep you bet, cable ties. Excuse the blurry photo

IMG_0425

I had three sets of pliers but none of them would open up wide enough to grab both bits of the clamp. I’d say each clamp took 15-20 minutes to undo X 4.
Add to that actually removing the hoses. The ends connected to the radiator went well, maybe 1 minute each. The ones connected to the motor… maybe 30 minutes each! They were virtually melted on.
So all that aside, inside the hoses was a weird silty mud – not sure what it is, maybe some kind of leak fix?image
Back to the belts, now around 15:30, I drove around to SCA to see if I could confirm if the belts were correct… hmm, seemed correct according to their in-store chart. Phew, all of them are identical. When buying parts online (and offline for that matter), you usually quote your year/month and make to make sure you get the right ones. Thinking I may have made a mistake, I was pleased to see they were all the same.

IMG_0433Crop

This story is hard to follow, but I returned to flushing the radiator and refilling it with a brilliant red coolant. It felt much better to have that filth out of it, and some coolant in there. What came out of it just looked very watered down original 200,000KM old coolant – looked almost like petrol.

So, I drove home on one belt and naturally it ran fine (that’s redundancy for you) and did some more research… mine is a HZJ78R. I found one eBay listing that says specifically that the belts I was using are not compatible with the R models. I have no idea what the differences are.

So the two wrongs are the fact the belts that came off it were wrong and I was sent were wrong. Clearly it’s an easy mistake to make.  The upside of all of this, is I’ve discovered that belts aren’t made to suite the car, the car manufacturer uses standard belts. This may all sound obvious to automotive veterans, but I didn’t know. For example, the 11A1005 belt part number means 11mm wide and 1005mm long. If I can’t find the specification for my configuration, I’ll just buy one that’s maybe a centimetre or two longer – simple as that! Wish I knew that before!

Cassie finished installing the 3rd flyscreen – which may end up being the last. We may not end up putting one on the window next to the fridge as it always has the solar shade on it.

Ok, so where did they ‘Toyoda’ name come from?
Well, Cassie pointed above the air cleaner there is this plastic box (almost like a growth off the air intake, no idea what it does) that has ‘TOYODA’ and a part number… no idea what that’s about. Plus it ties in reference to Yoda from Star Wars who is quite the awesome ‘know all' and super wise ugly short old thing. I don’t imagine this name will stick, but it was funny enough for the post.

Tuesday, November 15, 2011

Flyscreens

On our last trip, we discovered the importance of flyscreens. On the first night, we had setup camp outside Wagga Wagga. It had rained a bit before we went to bed, so it was humid and hot. But there was so many bugs we couldn’t open the windows. Thinking perhaps it was a single occurrence, or second night was the same, but this time hundreds of mosquitos! We purchased the flyscreen material and tried all means of fixing them to the sliding rear windows. First night, we used electrical tape. Sorted! we thought… but the next day they blew off while driving. Protecting our remaining valuable screens, we took them off each day and fixed them again each evening. When we got to Fraser Island we started fixing what was left of them semi-permanently with 100 mph tape. Well, the tape held but the cloth screens seemed to tear out from the continual flapping in the wind.

You can see the evolution and declining quantities of screen we had left.

IMG_8197-1IMG_8255IMG_8799

When we were fuelling up east of Uluru at Curtin Springs, a new 78 series v8 hire camper passed us… with like residential looking flyscreens fitted to it’s rear sliding windows. How crap it looked I thought to myself, but how crap was I! The idea was excellent… not elegant, but excellent. It gave them permanent flyscreens but the ability to slide the windows. It also dawned on me that if this was for a hire camper, they would do the most practical thing, regardless of how it looked.

With all that behind us, we needed to come up with a solution for our new camper. Considering we are going to sections of the world were there is over a tonne of mosquitos per square kilometre, investing in some flyscreens should pay off. (Seriously, think about that, how much can a mosquito weigh?!)

We had quoted magnetic flyscreens at a whopping ~$580 which realistically is a lot of fuel at $.90/L. The solution would be good, and neat, but you couldn’t drive with them on.
I had considered making my own, and whilst outside test fitting some strips of magnet an idea smashed through my head… why not just fit the flyscreen like you would to a door? put it over the gap and squeeze the beading strip in. Well, tried it last night and it seemed to work.

Tonight I picked up some aluminium fly screen which is quite tough and rigid and feels very nice. You can see from the pictures below how it looks. You can also notice where I accidently tore a bit of it in the corner. The corners are really tight (virtually too tight to fit the bead in) and caused me to use too much force.

Already a little bit disappointed with the top corner, the whole bottom straight section was as an utter disappointment as it was too tight to fit the bead in at all. Cassie however did some awesome folding trick and the screen seems to hold itself in there perfectly.

The only downside I can see so far is that if the glass gets dirty underneath, it’s going to be difficult to clean without leaving dirty patterns on the glass after washing.

I’m torn between installing them all before the camping trip and seeing how they perform on the ~400KM camping trip in a fortnights time or the ‘play it safe’ approach by just installing one and seeing what happens without risking the rest. They take about 30 minutes to install now we know how to do it, but it is a two person job. Maybe I’ll go for a quick test drive with this one and see if it budges at all before fitting the rest.

IMG_0299IMG_0302

The ~$580 quote did include one for the back door which was very cool. It allowed you to walk through it and it snapped shut behind you. This will take some practice and development, but I am keen to see what we can come up with.
Another idea on the drawing board (hey, I’ll get it all out in one go) is a flyscreen tent. It’s all well and good having the car bug-proof, but you can’t spend all your time in it. These guys did roughly our trip a few years ago, and at least through Russia I think they lived in it.

That, or one of these. Not decided yet which idea I prefer, they both have strengths and weaknesses.

image

I would say the attached solution would be easier to setup each day, but it is attached (but boring sitting next to the car all the time) and doesn’t allow access into the car without letting bugs in (that would be awesome) but then again, if we had the above, we might set it a bit further forward so we could get in the front door …ideas… ideas… ideas.

Thursday, November 10, 2011

Russian Lessons

Well… the lack there of. So Cassie is studiously attending Russian lessons each Thursday evening, but I can’t bring myself to attend. I’ve been to one and a half of them – it’s just all too much. Maybe I’m too arrogant or insecure to risk feeling stupid.
I came home early today to study up on the alphabet, but when I went to put in to practice translating a basic sign, I couldn’t make any sense of it. And I mean, none at all. Google translate gets it pretty close but it was still nearly useless.
B&G_Russia_856
According to Google Translate it means ‘NOTE! DANGEROUS RABBIT LOOP’
According to my rough phonetic translation it reads ‘VNIMANIE! OPACIY UCHACTOK’
I’m not sure about you, but if my life depended on it, I couldn’t read the words on that sign.
It puts me in such a fowl mood but I’m not sure if it’s because I can’t figure it out or because other people can. Throughout my life I’ve felt comfortable with learning as it usually builds progressively on things you already know. It’s no great leap for a mechanic to learn about a new kind of engine, but for a mechanic to learn hairdressing or painting, it just doesn’t seem to happen. I would guess that people pursue careers or interests in fields that are in line with their thinking. I seem to have a mind that likes to solve problems. I love fixing things and figuring out how they work… it seems like a natural progression that I work in IT.
Learning another language to which I have no basis to build on just isn’t working. I’m quite disappointed in myself and feel selfish and stupid for giving up on it. It just doesn’t compute for me. Cassie would argue that it doesn’t make sense to her either, but I challenge that her mind is better equipped for this kind of learning… and in a classroom environment. That or she is more disciplined and not lazy.

Update: Cassie has just gotten home and working with Google translate: Attention! Dangerous site loop.
We still cant quite figure out what the bit in brackets are but it keeps coming up with 'cleft'

Tuesday, November 8, 2011

Updates

Hey – sorry for the infrequent updates. I guess we’ve been busy.

I also don’t like writing about down moments as it seems like complaining. Everyone has their own problems, so reading about someone else's is boring.

I’ve personally owned two new mobile phones in my life. My first was when I was 17,

It was a Nokia 8310 – a beautiful tiny phone that was fast, super reliable and did exactly what a mobile phone did. I look back on it with fond memories as it was much more than a phone… it was independence.486px-Nokia_8310_phone Not only could I now drive at this age, but I could call and text which were huge steps socially. I still wish I had it for some odd reason, but I’m sure I gave it away.

Doing what all old people do, I’ll tell of all it’s wiz-bang features which were ahead of it’s time. GPRS, Infrared, WAP, 5 text lines, could store 150 SMS and had an integrated antenna! it was a thing of beauty. The reason for this rant… I have a new phone.

It can store a few more than 150 SMS, it’s quad band & CDMA, GPS and GLONASS, I could go on, but most of all, it has a stunning camera in it. 8MP stills and 1080p video is breathtaking. MUCH MUCH clearer than my JVC video camera. Heaps of my blog photos previous to now were taken with an out-dated hand-me-down phone. I took some video on the weekend, and on Monday and the results are outstanding. It’s completely negated the JVC. It won’t go as far to replace a proper HD handy-cam, but for convenience, it will always win. Frustratingly  in one instance on Monday, it significantly outperformed my DSLR camera! You have to click on the sample below to see the clarity and depth of field that this gem captures. In case you haven't guessed, it’s an iPhone 4S.IMG_0191
I certainly don’t ride on the brand of it, but as a device, seemingly nothing else beats it. How this all relates to our trip is to be explained. Aside from being a world phone, It can be used for navigation in cities, captures geotagged photo and video, translating signs and voice, banking facilities… the list goes on. This is going to be our most used tool for sure! I shouldn’t feel guilty buying a new phone should I? It’s been 9 years!

OK so this picture is me revisiting the in-cab winch controller idea. Although technically it works perfect, it has one major and obvious flaw… you need to be in the cab to use it.
So?! you might say, you’ll be in the car when your winching. True!, but you’re not in the car when you’re ‘nipping’ the rope back on to the bullbar, or trying to confirm what gear the winch is in (when you can’t see it from the cab), or winding out a tiny bit of length at the anchor point. The in-cab switch has now become the backup method to the new wireless winch controller. Best of all, it means I don’t need to carry and store the bulky wire winch controller now.

IMG_0196controller
Initially I was concerned at the prospect of a wireless system. The only protection against false activation is the power switch on the side of the remote which protects against accidental button presses, but doesn’t protect against interference from other sources…. pfst, that’s rubbish. I had visions of driving under power lines and running over the winch rope as we drive along at highway speeds. Might sound extreme, but I’d say it’s entirely possible. So, I built the system with a red isolator switch in it. It isolates everything, the socket on the bar, the dash switch and both wireless controllers. And because it’s red, surely we’ll notice it if it’s accidently left on.

On a side note, that pic of the controller was snapped from a video. Anyone who knows anything about video, you can’t just snap a frame out of a video, it looks rubbish, blurry and pixelated…. but then again, I’m continually impressed with this camera!

Wow, I nearly forgot… more important than the car, we’re learning Russian. The words written at the top of my notes read: “So hard, so difficult” was a direct quote from our Russian teacher!
To be honest, I suspect it’s her Russian pessimism shining through as it does seem fairly straight forward. I admit, I did ‘rage-quit’ the second session, I didn’t get it at all and I wasn’t in the right frame of mind to continue. Everyone in the class had seemingly done the class activities at home previous, so as they go around the room reading words, I take one minute to figure out a word while they all shout it out like kiss-asses, making me look like a right dumbass. So far I’ve leant 70% of the alphabet which once that’s done, the rest will be easy.
It’s difficult because a lot of the letters look similar to our alphabet, but have an entirely different sound in Russian.